
How to Use Carb Cleaner and Make Your Engine Look and Perform Like New
Are you a fuel head? Do you love taking care of vehicles yourself? If you are someone who loves to keep the internal part of their car just as clean as the external part, then this article is for you. Vehicle owners usually get their new vehicles polished or get an expensive car wash.
More...
But the most important part that a lot of owners forget is the engine. It may be because the engine is hidden under the hood or because most people don’t have a working knowledge of engines.
But, basic knowledge is necessary to keep your car running smoothly for longer. Knowing how to use carb cleaner can come very handy and you could save a lot of money as well.
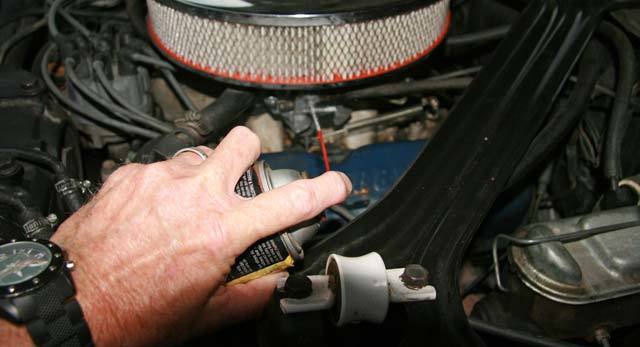
Image source: oldcarsweekly.com
Like every car owner, I was also very excited to purchase my first car. I had done thorough research about the best options available in the market and made my choice after a lot of consideration and discussions with other car owners.
After a few months, I realized that cleaning the engine was as important as cleaning the outside of the car. I was very confused on how I could clean my engine correctly.
This is when I did a detailed online research, which taught me how to clean choked valves and carburetors. It was much easier than I had initially thought it to be. I was under the impression that I would have to purchase a set of tools and spend days learning how to properly use them, but that wasn’t the case. I have shared my knowledge through this blog post as to what a carb cleaner is, what it does, and how you should use it.
What is a Carburetor?
In order for you to understand what a carb cleaner is, you need to first know what carb is. Carb is short for a carburetor. It is also called the heart of a vehicle. A carburetor has two spinning valves that are placed above and below the venturi.
The top valve is called the “choke” that handles how much air can flow in. If the valve is closed, less air can enter, which causes venturi to suck in more fuel. It gives the engine a fuel-rich mixture. This is helpful when the car is cold or the engine has just started and needs time to heat up.
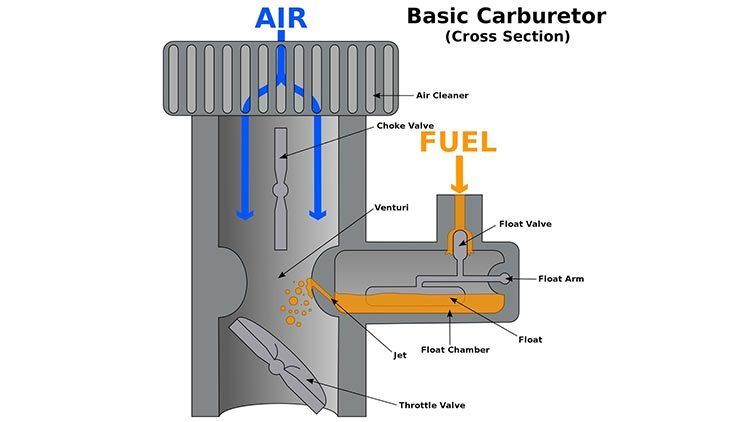
The second valve is called “throttle.” If the throttle is more open, then more air will flow through the carburetor, which means more fuel gets dragged from the pipe to the sides. When this happens, the engine releases more energy and the car goes faster. This is why the car accelerates while opening up the throttle. A good example would be that it is like blowing on a campfire to help it burn quicker.
Why Do You Need to Clean the Carb?
Carburetors are one of the most common problem areas in all combustion vehicles. When a car sits for a long time, the fuel starts to go bad. The fuel slowly starts to thicken, which makes different parts stick to each other and results in a disturbed movement. One of the tell-tale signs of the gas going bad is that it starts to smell like turpentine.
It is highly recommended that you clean your carburetor once in a while. You could take it to a repair shop to get it cleaned, but learning to do so yourself will save you not only a lot of time but a decent amount of money as well. Before you start dismantling your car, make sure that it is the carburetor that is giving the problem and not some other area entirely.
How to Clean the Carburetor
Tools and materials you will need to clean the carburetor at home.
There are two ways in which you could clean the carburetor. You could either do it manually by removing the parts or you could do it by using a carb spray. Both of the methods have been explained below.
Method 1 – Cleaning Manually by Removing the Parts
Step 1: Take off the Air Filter
Make sure that the fuel supply is closed. Disconnect the spark plug for your safety. Proceed to take the air filter off, which is placed either in a box or behind one. A wing nut holds the filter down and it can be unscrewed easily. Remove the element and clean it using foam air filter or compressed air.
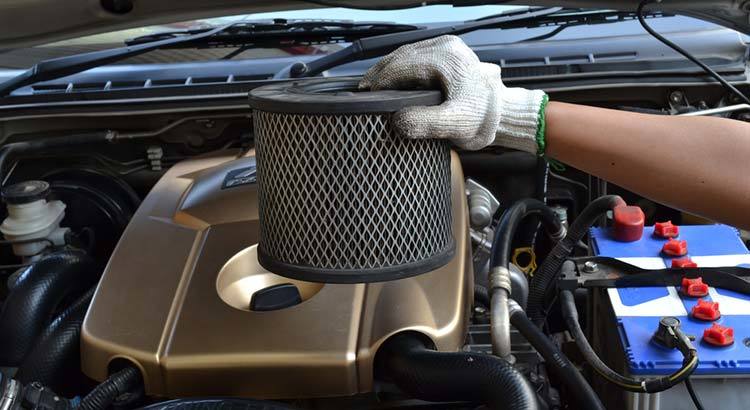
Image source: yourmechanic.com
Step 2: Removing Hoses and Linkage
Before removing any linkage or hoses, take a few pictures from different angles. It will help out a lot in case you forget what goes where. Springs can be easily removed with pliers or even a pencil. Be careful not to break or bend anything while doing so.
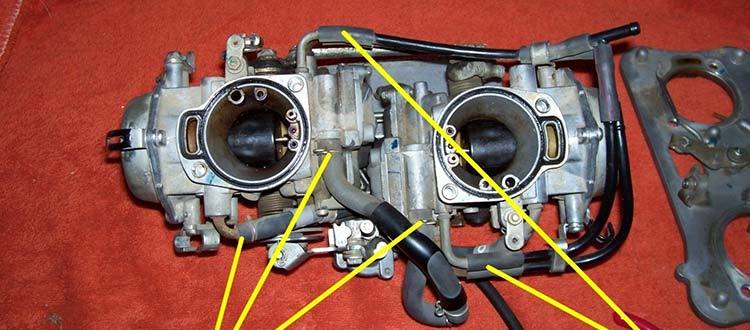
Image source: jmartino.me
Step 3: Remove Carburetor
Carefully unscrew and remove all the nuts and bolts that hold the carburetor to the engine. Slowly move the carburetor back and forth to break it free. Make a mental note of the location of the gaskets and also orientations.
Step 4: Take off Float Cover
Keep a small bowl handy nearby. You may need it in case there is gas in the float. Carefully remove the bolt, which is at the bottom of the carburetor. Pull the float cover to remove it. Be careful as gas might spill all over. If there is any gas, use a bowl to store it.
Step 5: Remove the Float Pin
You will see a pin that the float depends on. Slowly pull it out straight. Be careful not to bend it. If by mistake you drop it, it will most likely bounce out of your reach.
Step 6: Remove the Float
Slowly pull the float out. Make sure that you pull it out straight. Remember the process as it will help when you have to put it back.
Step 7: Remove the Other Items
In order for you to be able to clean the carburetor properly, remove all the other items. Store all the items that you removed in a small compartment safely so that you do not lose or misplace them.
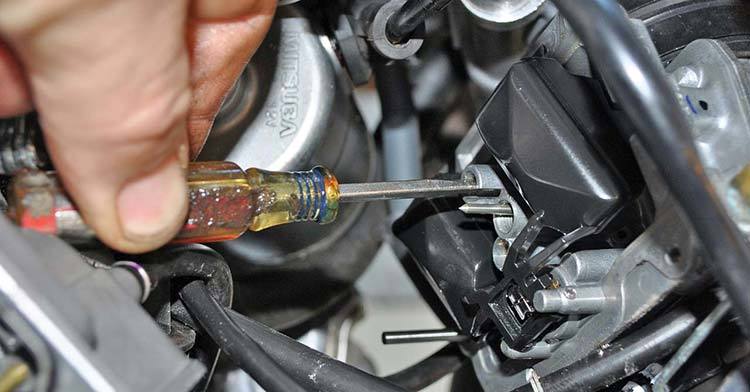
Image source: atvillustrated.com
Step 8: Clean the Carburetor
Now, that you have successfully removed all the items that had to be removed. You can clean the carburetor in a solvent bath. Clean the outside portion with a brush. Try to clean it as much as you can especially near the opening.
You can use a light solvent to clean the inside. You could also use a burst of air but make sure that it is very light. It is very important to clean the small vents. You could use the solvent here as well.
Step 9: Dry the carburetor
Leave the carburetor out to dry. Make sure it is completely dry and as clean as it could be before you start putting it all back.
Step 10: Put back the Carburetor
Before you attach the tank and fuel line to the carb, pour a small amount of clean fuel over it. Re-install every part, linkage and hoses with the help of the pictures you took earlier. Once you have successfully put everything back, rev the engine up, and take your car for a spin.
Here is a video tutorial showing how you could take the carburetor apart to clean it.
Method 2 - Cleaning the Carburetor with a Spray
Step 1: Remove the Cleaner Unit
You will have to remove the air unit by unscrewing the wing nut.
Step2: Spray the Carburetor
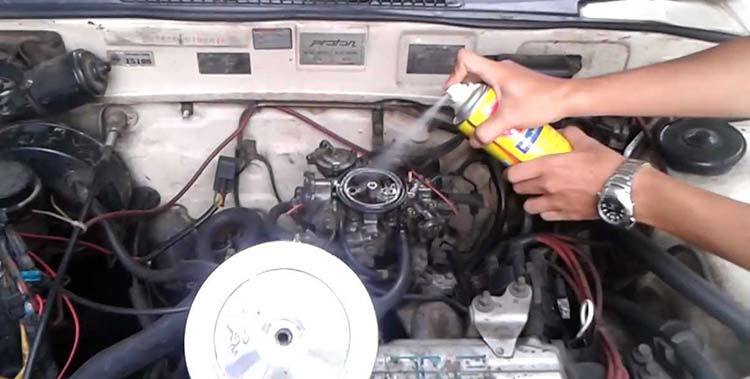
Spray the carb can on top of the carburetor, covering all reachable parts. This will help loosen all the dirt and grease. Clean with a piece of towel.
Step 3: Spray While Running the Car
Start the engine. Make sure to spray the carburetor cleaner directly down the throat and all around the outside of the carburetor. Wait for a couple of minutes and shut off the engine.
Step 4: Spray Again
Spray heavily outside as well as inside the carburetor. Start the engine and repeat the process.
Step 5: Clean with Towels
Clean all the reachable parts with clean towels. The towels will help you clean the grease properly. Re-install all parts.
This video link shows you how to clean the carburetor with a spray. Have a look!
Conclusion!
These are the two ways in which you could clean the carburetor of a vehicle. The method using the carb spray is much more preferable if you are new to this and don’t want to take any risks. Misplacing some nuts and bolts or not knowing how to put parts back together could end up costing you more than you planned on saving.
I hope you enjoyed reading this blog post, and the steps were easy to understand. You should be able to safely dismantle and re-install all parts together if you follow the steps properly. Don’t forget to share this blog post on all your social media account so that others like you can also benefit from it. Feel free to leave your comments below. Do let us know whether you found this guide to be helpful.
Related Posts
Top Simple Ways to Improve the Look of Your Car
How to Increase Your Visibility When Driving at Night
Are Dodge Chargers Expensive to Fix?
Fleet Fuel Cards for Optimal Car or Truck Expense Tracking
A look under the hood of Waymo robotaxis
