
How To Vacuum Ac System In Your Car: Simple And Cost Effective DIY Guide To Keep Car Ac In Good Condition
Is your car’s air conditioner not spewing out cool air as it normally does? The problem may be due to air or moisture trapped inside the car. Moisture or air trapped inside your car’s air conditioning system should be removed as they can lead to system damage over the long term.
More...
Further this may turn into a major issue of concern as the moisture not only affects the performance of the air conditioner, but also can freeze the system.
Here is a guide on how to vacuum AC system in your car. This guide will take you through the steps required in detail, so you can recharge the AC and have it return to its normal working condition.
How To Vacuum Ac System In Your Car?
Why Should You Be Worried About Trapped Moisture Or Air?
The air or moisture trapped prevents the system from cooling the interior of your car properly.
- The trapped air or moisture can result in loss of oiling capability of the AC compressor. The compressor will be affected if you do not vacuum the moisture/air and just top up the refrigerant alone.
- Presence of moisture results in condensation and freezing of the air conditioning system. The condensed water particles will corrode the system. This results in reduced flow of air. The pressure and temperature differential will be reduced resulting in poor cooling. This leads to damage to the compressor and expensive repairs over the long term.
- If the vacuuming and fresh addition of refrigerant is not done at regular intervals of two years the refrigerant will start to leak resulting in lack of oil for proper functioning of the compressor.Manufacturers usually recommend a complete vacuuming of the system every time it undergoes service. This will help remove any residual moisture. The compressor will last for a longer time this way.
When you create a deep vacuum, it will remove the moisture effectively. This is a low cost maintenance step that will ensure your car AC remains healthy. You can either rent the vacuum pump or purchase it depending on whether you want to invest for the maintenance or not.
Expert Tip:
It is best to buy a high quality vacuum pump of electrical type. It is easy to maintain. You need to follow the instruction manual given with it and keep it oiled regularly. If you follow this, it can last up to 10 years or even more than that. If you find the pump is not working as it should or has slowed down or if it appears cloudy or dirty, change the oil.
Things You Will Need
- Gauge manifold
- Vacuum pump for car AC (electric)
- Can of refrigerant or Freon

Steps To Vacuum AC System
Follow the steps below to complete an effective vacuuming of the AC system and recharge it, returning the AC to its pristine working condition.
Step 1:
Park your car on a flat surface and turn the air conditioner off. Also keep the car engine switched off. Keep the emergency brake applied and ensure the car’s transmission is in park position.
Step 2:
Wear protective gloves and eye wear. Before attaching the gauge manifold set identify the high and low pressure ports.
You can locate the high port between orifice tube or expansion valve and condenser. This is larger of the two ports.
The low pressure/side port is present in between compressor and evaporator (firewall).
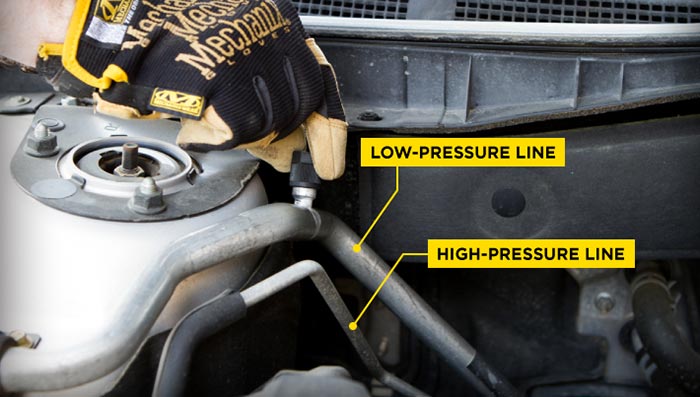
Image source: acprocold.com
Step 3:
Now hook the refrigerant manifold gauge set. Connect the hose of the vacuum pump to the port for low pressure in the gauge. This is the port found in between the gauges. This step is crucial for effective vacuuming. It can maintain the vacuum even after you shut down the pump. And you can recharge the AC with refrigerant only when the vacuum reaches the appropriate level.
The purpose of the gauge set is to connect the AC system to the low and high pressure ports. This helps easy vacuuming and recharging.
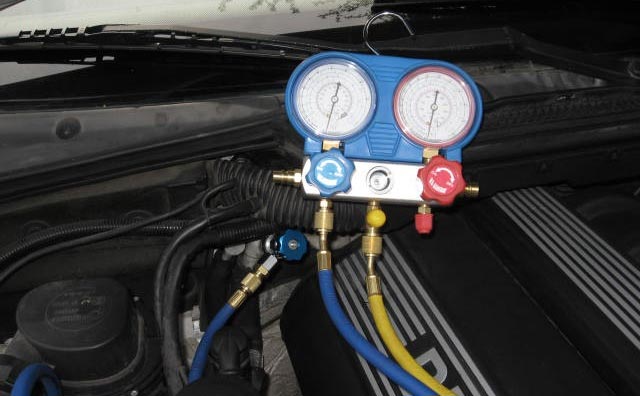
Image Source: Bimmer forums
Step 4:
Check for tight port connections to prevent any leakage. All the valves and hose fittings should be air tight.
The red colored connector valve and gauge indicates the high pressure part of the gauge and the blue color indicates low pressure part.
The yellow colored central hose connects to vacuum pump initially and then when vacuuming is over, it is connected to refrigerant supplying can or bottle.
Ensure both valves in the gauge are closed before you connect it to the car AC system.
Step 5:
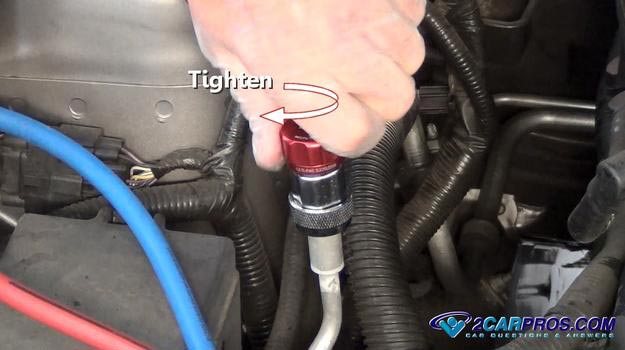
After locating low pressure port, connect it to the gauge by lifting the connector ring upward and then pushing it down. Now turn the blue valve screw in inward or clockwise direction to open up service valve that is present underneath.
Now repeat this step for the high and low pressure ports. Since the fittings for the two ports will work on the respective ports only because of size limitations and to prevent confusion. When you have completely secured the ports, tighten the small valve which activates internal plunger. The plunger helps to open port valve to refrigerant lines.
Step 6:
Now check the readings in the two gauges (both low and high side ports) with valves in closed position. The pressure should indicate zero reading.
Step 7:
Connect AC vacuum pump to gauge manifold of refrigerant by connecting the yellow central hose present in gauge set to vacuum pump and turn the pump on. The vacuum level should be checked until it reaches 27 Hg or 28-29 inches. The pump should be run for a minimum of 30-45 minutes. This removes the static air and moisture present inside your car’s AC system.
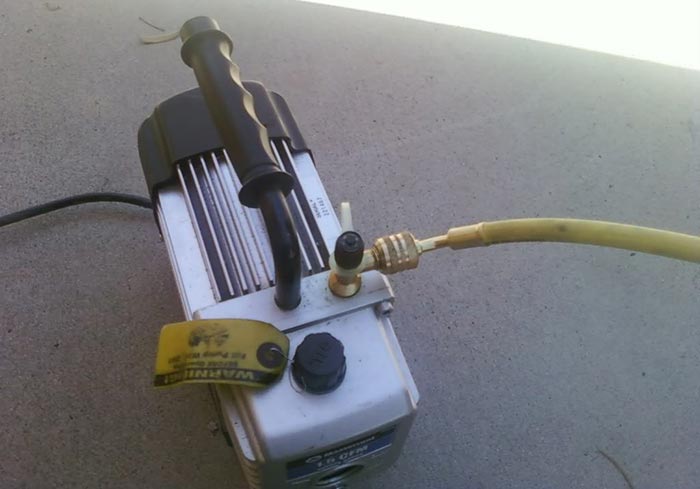
Image source: honda-tech.com
Normally the AC system has a combination of oil and refrigerant to ensure the compressor is kept well lubricated while the system is operating. Since it is difficult to measure the oil level in the system, as it is spread out, you need to be careful while adding the oil.
If it is a big leak and you can see oil dripping from the system. In case of minor leaks, there will be very little oil dripping out. You can add oil in small amounts accordingly.
Step 8:
To let the vacuum pump do its work, open the valve on the low port side of the gauge. This will pull the vacuum inside the system. This will be indicated by the moving needle in the gauge. The tone of the pump changes when the valve is opened fully. It begins to pull out air fully from the AC.
After running the pump for about 30 minutes, close the valve on the low pressure side and switch off the pump. The system should hold pressure at around 27 -29 inches. If this level is not reached, it indicates a major leak.
If it is a small leak the level is reached but vacuum is lost after closure of valve. You need to recheck the system for any leak. Leaks can occur in the hose connected to valve set or the O ring may be faulty. If you find the vacuum is held for 15 minutes without any change, you can proceed to adding the refrigerant.
Step 9:
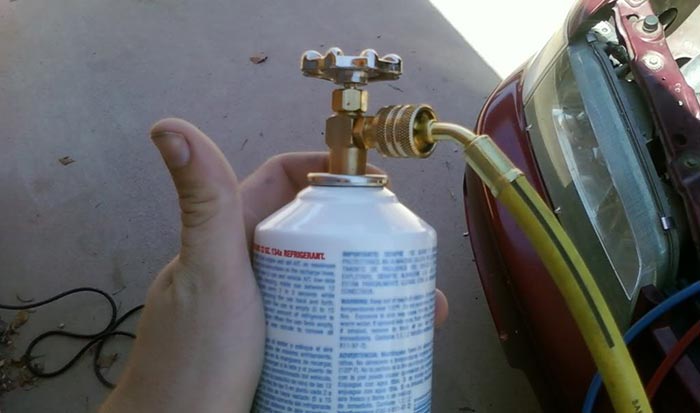
Remove the hose from vacuum pump. Place it in the refrigerant can or in Freon. Now start your car. Turn the air conditioner on. Open low pressure in the manifold gradually. This will allow even flow of Freon or other refrigerant into the AC.
Watch this YouTube video to get a more clear idea of the process:
Precautionary tip
Refrigerant gauge is a great money and time saver. If you do not use it and opt to hook the vacuum pump directly to the Air conditioner, there will be loss of vacuum whenever you disconnect the connector hose from the vacuum pump. This will make it difficult for the moisture to evaporate completely.
Now that you have gone through our step by step guide on how to vacuum AC system in your car, you can easily perform the task on your own. You can have your car Air Conditioner running efficiently and enjoy the cool air in comfort. The steps can be completed in a short time and do not need much technical know how.
If you liked our tutorial on vacuuming car AC, please share it on social media to let your friends’ network benefit from it as you did. And remember to post your comments below. We look forward to your valuable feedback.
Related Posts
Are Dodge Chargers Expensive to Fix?
Fleet Fuel Cards for Optimal Car or Truck Expense Tracking
Top Simple Ways to Improve the Look of Your Car
The Top 10 Safest Vehicles In The US 2022
3 Things You MUST Know Before Buying Car Parts