
How to Remove Oil Filter? DIY Tricks to Get Your Car Movin’ in No Time!
Are you struggling to get your car’s oil filter out? Do you want to change the oil of your car on your own? Do you want to know how to remove oil filter and swap it with a new one?
More...
If these are some of the many problems you can relate with, then you have arrived at the right spot. Oil filter in a car is one of the most significant equipment, since it keeps the car in the best condition possible. How? It is when you switch the motor oil and filter of your car at the right time, not much earlier and not even after many years.
How to Remove Oil Filter?

What is Oil Filter?
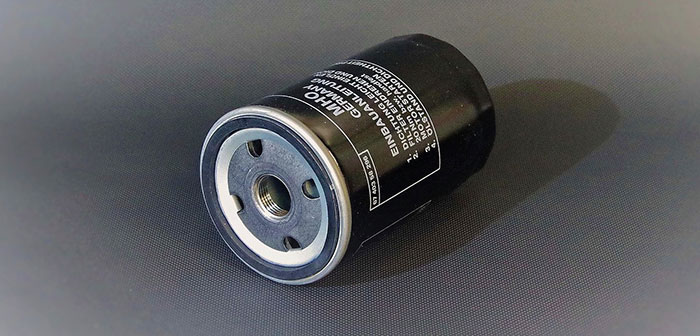
An oil filter works as a filter in order to remove contaminants and impurities from the engine oil, lubricating oil, transmission oil, or hydraulic oil. These pollutants pile up in the car’s engine over time and thus the oil keeps it clean.
Why Do You Need to Change the Filter?
It is recommended to swap your oil filter from time to time. However, what are the reasons behind this? Read on.
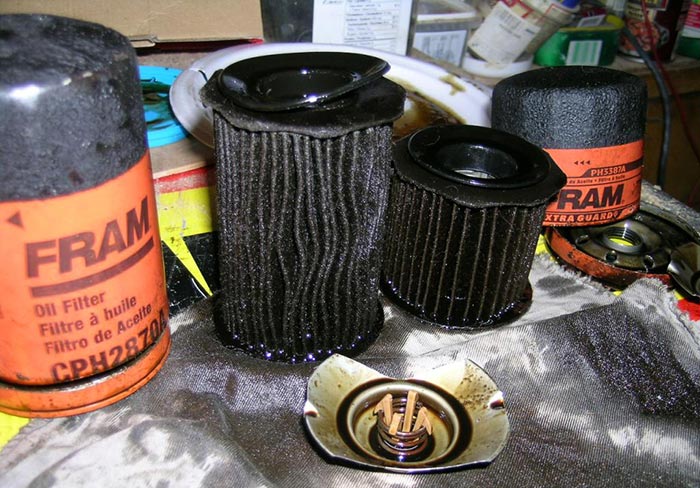
Image Source: newbeetle.org
The motor oil can become saturated with hard and small particles if you do not remove it with time. These tiny particles can corrode the surface of the engine. Plus, the dirty oil can also wear the machined components of the pump and thus deteriorate the engine’s bearing surfaces.
Just like blood is to our body, oil is to the car’s engine. It flows throughout the engine of the car and ensures that it runs smoothly. When you change the filter and oil on a frequent basis, your car’s life as well as performance can amplify.
I have found this video that will give you a visual experience of your old oil filter and what happens to it when it is not changed for a long time.
How Do Oil Filters Function?
The oil filter’s exterior surface is made of a metal can that is equipped with a sealing gasket, which tightly holds it against the mating surface of the engine. The can’s base plate, which has pierced holes, clutches the gasket. In this, there is a middle hole that helps to merge with the engine’s oil filter assembly.
Inside the metal can, there is the oil filter equipment, which is typically fabricated using synthetic fiber. The oil pump in the engine directly transfers the oil to the filer, from where it goes via the holes to the base plate’s edges. The unclean oil is pushed through the filter owing to the pressure and again through the middle hole from where it enters in the engine again.
When Should You Change the Oil Filter?
It is suggested to change the oil filter after every 3 months or after your car has been run 3,000 to 5,000 miles. However, the mileage and the time gap can vary from manufacturer to manufacturer. Generally, manufacturers increase these figures.
What You Should Know Before Buying a New Oil Filter?
It is imperative that you buy a new oil filter by taking into account some significant factors. Although all the oil filters might look similar to you, it is not the case. There are minor differences in the gasket size or threads of the oil filter, which determines the fit of the oil filter on your vehicle.
The best way to figure out if the oil filter is ideal for your car is that you should consult the manufacturer’s manual or parts catalog. If you choose the wrong oil filter, it can lead to oil leakage or even falling off of the filter, which in turn can further damage the car’s engine.
What You Need to Switch the Oil Filter?
Keep the following things handy when preparing to swap the oil filter.
- Wrench set for the oil filter (You can use this guide to buy one for your own)
- Funnel
- New oil filter
- Work gloves
- Safety glasses
- Hand cleaner
- Type and amount of new oil that is specified in the manufacturer’s service manual
- Oil recycling container to hold the specified oil
- Ramps
- Clean rags
- Chucks
Steps to Remove Oil Filter
Time taken: 30 minutes
The following steps must be followed to remove the oil filter from your car.
Step 1: Start Your Car’s Engine.
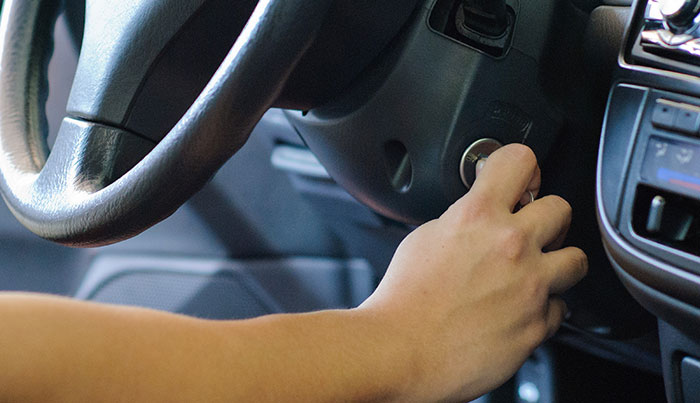
Image source: says.com
First of all, you need to run your car’s engine. This will make the motor oil warm, which will drain faster as compared to cold oil. However, make sure you do not extend the time over a few minutes or run the engine to its full operating temperature, since very hot oil is not safe enough to drain.
Step 2: Drive the Car on the Two Ramps.
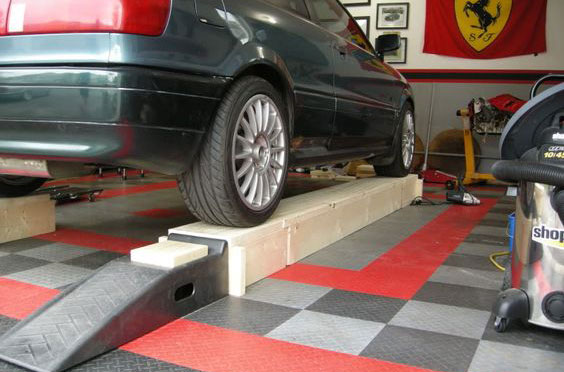
Image source: garagejournal.com
Now, you need to put the parking brakes and take out the keys. To be safe, place the chucks at the rear of the wheels and wear the safety gloves and glasses.
Step 3: Unlock the Drain Plug
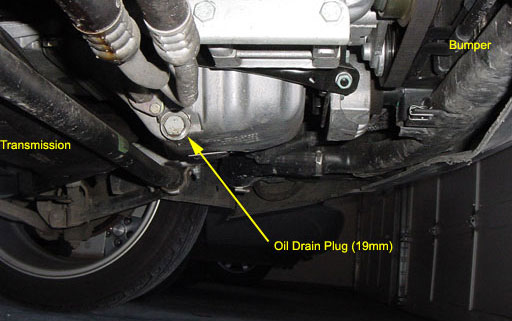
Image source: insurify.com
Look for the oil drain plug in your car’s engine. You can take help from the service manual. Then, loosen this plug with the help of a socket wrench and put the oil pan beneath it. While doing this, keep in mind that the oil might be hot and will have an angled gush during the draining process, so you can push back the plug towards the pan in order to avoid the oil from flowing out till you are prepared for it.
Step 4: Drain the Oil
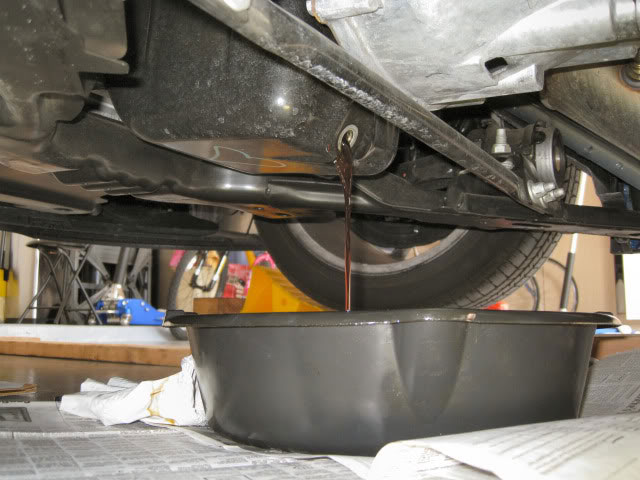
Image source: svtperformance.com
Now, drain the oil when you are ready. You can also remove the filler cap on your engine’s top, which will further accelerate the draining process, making space for air to enter the container.
Step 5: Replace the Oil Plug
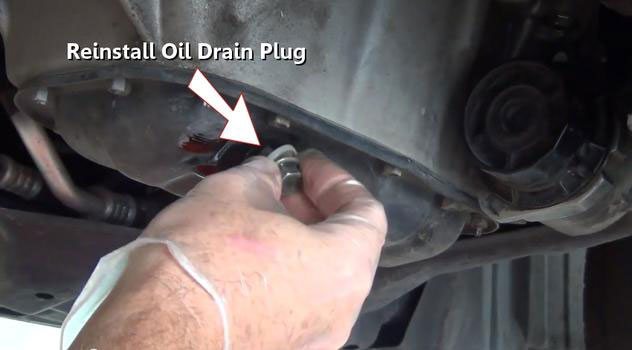
Image source: 2carpros.com
After you have drained the old oil, switch it with a new oil plug and use your hand to tighten it, while ensuring it is not cross-threaded. After you have done so, tighten the drain plug using a wrench without over-tightening it. You can also use a new gasket for the drain plug, if suggested in the manufacturer’s service manual.
Step 6: Change the Old Oil Filter

Image source: pennzoil.com
Now that you are done with draining the oil, the filter can still carry hot oil in it. For this, you need to first put the oil pan beneath the old oil filter and then take out the filter using the filter wrench. Be careful while doing this. Additionally, ensure that the gasket is not stuck to the old filter and clean the engine’s mounting surface with a rag.
Step 7: Place the New Oil Filter
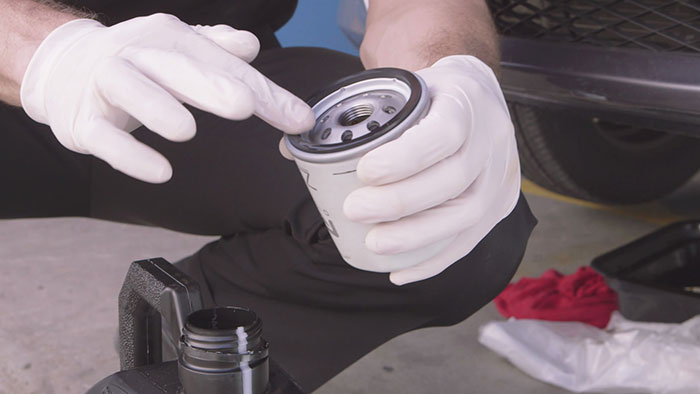
Image source: supercheapauto.com.au
Bring your new oil filter and put fresh oil on the rubber seal for lubrication. Check the seal to ensure that it is properly fitted and then tighten it with your hand. Read the instructions given on the filter to check if you need to screw it with a wrench, which is generally not required.
Step 8: Pour the New Oil
Once you are done with fitting the new oil filter, you can refill it with the new oil. For this, you need to open the hood of your car engine and locate the cap of the motor oil. Open this oil cap that has the symbol of oil.
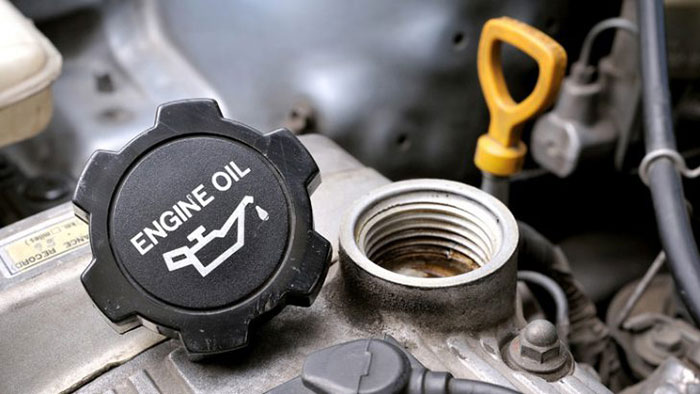
Image source: tyremarket.com
Now take the new oil and pour it in the filter. Make sure when you do this, you make use of a funnel that is clean. Additionally, only pour the type and amount of motor oil that is predetermined by your car’s manufacturer. After this, put back the cap in its original position and tighten it with your hand.

Image source: mrquicksoillube.com/
Step 9: Look for any Leakage
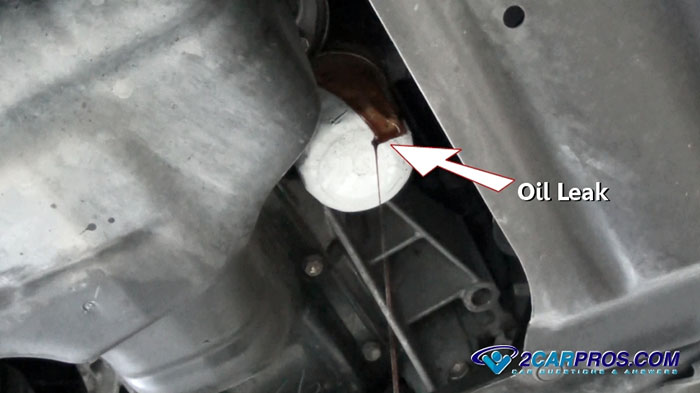
Now, start the engine and let it run for some time. In the meantime, check the surrounding area of the filter and the drain plug to look for any leaks. If there is any leakage, stop the engine and rectify the leakage. However, if there is no leakage, shut down the engine in order to give it some rest and let the oil drain out.
Step 10: Finish off
Now, you can remove the chucks and pull back the ramps. Additionally, dispose the old oil filter and oil properly by taking them to an authorized oil drop-off shop or to a recycle shop that can recycle the oil.
Conclusion!
So, this is how you can remove the oil as well as the oil filter from your vehicle. Removing the oil filter is a daunting task, yet if done properly it is very simple and quick. This guide takes you out from such a situation and lets you change the oil filter at your garage. By following this guide, you can simply as well as quickly swap your old oil filter with a new one.
Hope you enjoyed reading this blog post and found answers to your oil filter changing requirements. Do not forget to share this article with your friends to inform them about this tricky, but essential guide to remove oil filter. Additionally, put in your comments and let us know whether this guide proved to be useful and how it helped you.
Related Posts
Top Simple Ways to Improve the Look of Your Car
3 Things You MUST Know Before Buying Car Parts
How to Increase Your Visibility When Driving at Night
Are Dodge Chargers Expensive to Fix?
Fleet Fuel Cards for Optimal Car or Truck Expense Tracking