
How to Adjust Projector Headlight. 6 Things You Must Do
Are you among the thousands of drivers who replace their stock headlights with projector lights? While most of the cars have perfect stock headlights, some cars have undesirable headlights that don’t provide the required beam.
More...
For this basic reason, you might want to install custom projector lights. But do you know How to adjust projector headlights?
Projector headlights give a brighter and far reaching beam, which makes it safer for night driving. Nevertheless, this bright beam may create a hazardous environment for yourself and other motorists if they are not properly adjusted.
If you aim your projector headlights too high, you risk blinding oncoming motorists. If you aim them too low, you risk your own visibility. The good news is, you can adjust your own projector headlights at home without the need of consulting a professional installer. Below, I have prepared a simple guide on how to go about it.
How to Adjust Projector Headlight
1. Why Projector Headlights?
Basically, projector headlights are headlights with a spherical lens that concentrates light from a bulb to give you a more focussed light beam. I have found projector headlights to have an edge over the stock high and low beam headlights.
- Focused Beams – the elliptical reflectors and the lens that comes with the projector headlights give a more focussed light beam with minimal ray scattering.
- Aesthetics – projector headlights have a way of transforming the look of your car. I guess this is the reason we see sport cars looking cool and classy. Likewise, you can give your interior design of the car a luxury look with the perfect and elegant car seat covers.
- High Visibility – the lens design and positioning in projector headlights produce a light beam that is best suited for night driving as opposed to the conventional parabolic reflector headlights.
- Highly Customizable - the growing market demand and popularity of aftermarket projector headlights has resulted in various varieties and custom options of headlights. You can opt for LED or halogen bulbs (they are considered the best headlight bulbs for rainy conditions), with halo rings, lazy eyes, running lights etc.
How to Aim Your Projector Headlight Prerequisites
2. What You Will Require...
1. Flat Parking Surface
Well you are going to adjust the position of the light beam in reference to the position of a normal smooth road and thus you need a parking space that is flat as possible. And obviously not busy.
2. Vertical Surface

This will be your screen. If possible find a vertical white wall because it looks cool and it will give you a better representation of the beam.
3. User Manual

Well of course you will need a user manual since different manufacturers have different products. And with projector headlight, standardization is the least of their worries.
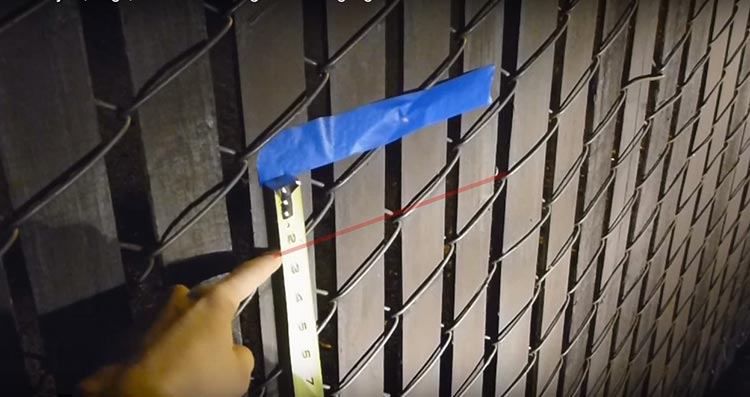
4. Measuring Tape

You don’t really need measuring tape if you can do great approximations like I do. But if you suffer from OCD, you will need this.
5. Screwdriver
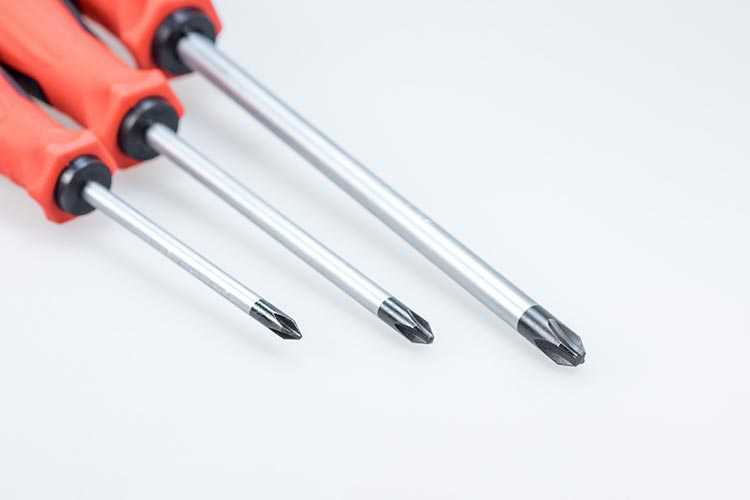
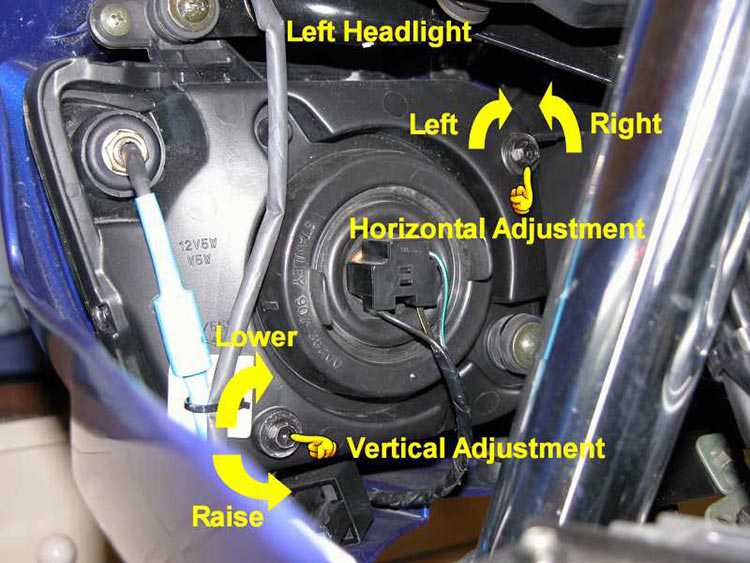
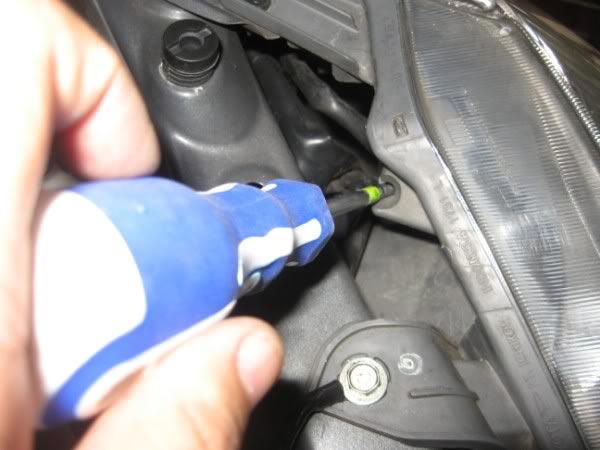
Screwdriver comes in handy to open any screws and in many instances, to do the actual adjusting.
6. Carpenter's Level

Via Amazon.com
If you are looking for precision, then you will want to have this one with you.
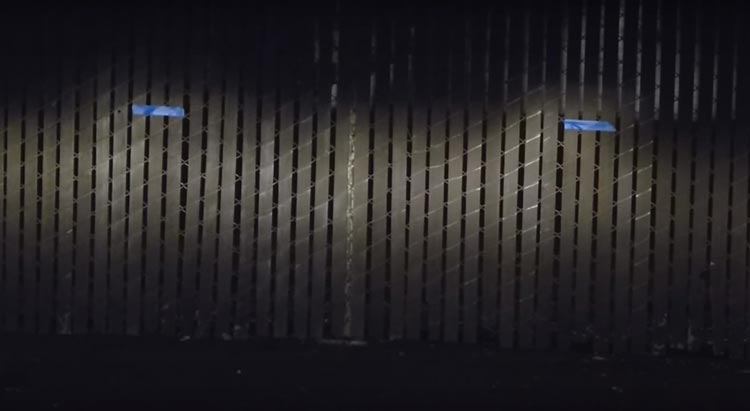
7. Masking Tape
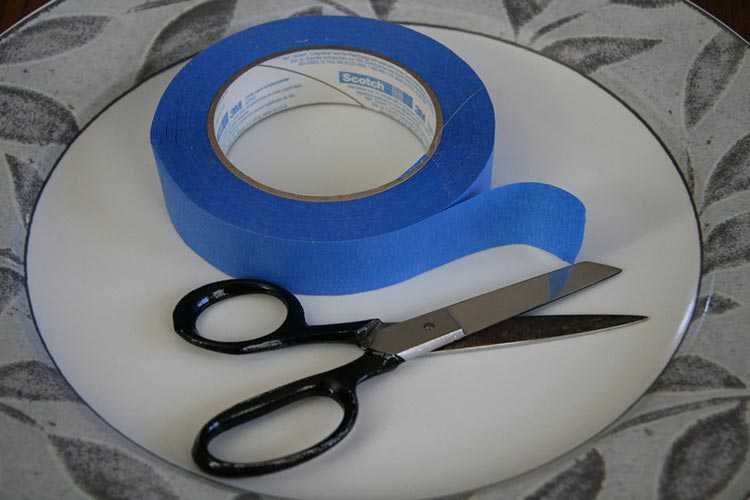
You will use Masking Tape to make any marks on the wall or on your neighbour’s garage door (yeah, you don’t want to leave any evidence behind).
3. Step by Step Instructions
- STEP 1
- STEP 2
- STEP 3
- STEP 4
- STEP 5
- STEP 6
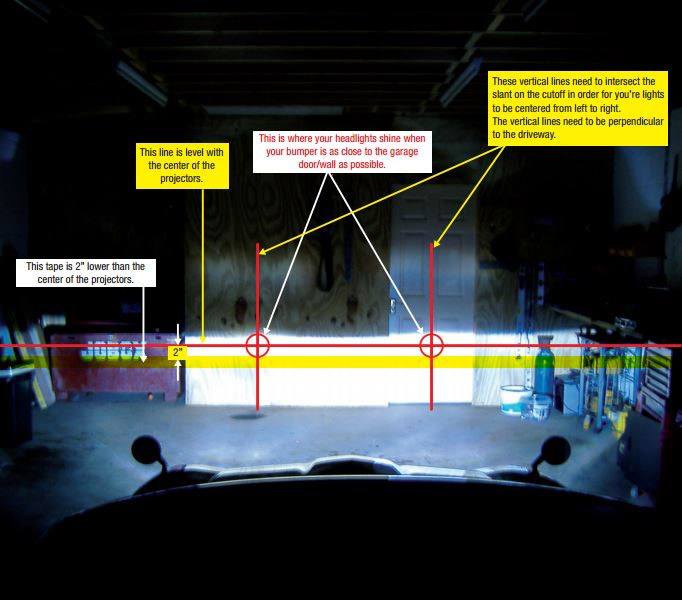
Get into Formation
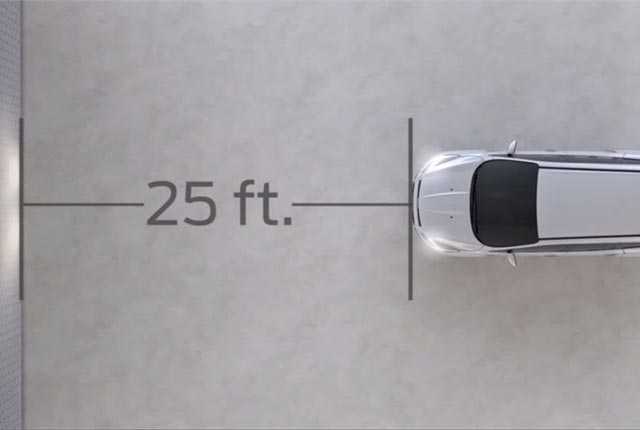
Park your car in the flat parking space overlooking your vertical screen. This can be your garage door, a flat wall, etc. You will need to have, 5 feet of clearance between your front bumper and your wall.
If possible, get more than 5 feet clearance because you will have to reverse 25 feet away to do the actual adjustment (heads up).

4. The Legal Twist
Let me add that the headlight aim specifications vary from jurisdiction to jurisdiction. State inspection units may have their own specifications that vary from manufacturer specifications.
For instance, the 2 inches below the centre line at 25 feet away specifications I described above are for Chrysler Group vehicles. In case your local inspection unit doesn’t provide the specifications, use the manufacturer issued specifications (read your user manual or read the online version of it).
5. What Are the Specifications?
With the beam produced by the projector headlamps, you want to be as considerate as possible to oncoming traffic. Here are some factory specifications from different manufacturers (as measured under the horizontal centerlines:
- 0 distance for GM cars.
- Below half an inch for Toyotas at 10-Ft. Away from your neighbour’s garage door where you made the marks.
- Below an inch all the way to slightly more than three and half inches for Nissan vehicles.
- Between 2 and 6 inches below the centerline for Chrysler Group vehicles at 25 ft. Away from your neighbour’s garage door where you made the marks.
You can get more information about your line here
Via Dapper Lightning
If you still get complaints from oncoming vehicles, you should lower the beam up to a point where you don’t affect your own visibility.
6. Parting Shot
It is of great importance that you check with your local authorities on the specifications required to place your headlight beams.
A proper headlight should have little to no “kickup” after the adjustments and the centre of the beam should have no bleeding. The goal is to be able to see the road surface, the road signs and pedestrians without blinding oncoming traffic.
I hope this article has been of help to you. Get your tools ready, the sun is about to set. Time to adjust your projector headlamps. If you liked this article, feel free to share it with your friends and circles. In case of any comment, question, suggestion or clarification, feel free to comment below. Thank you for reading.
Related Posts
3 Things You MUST Know Before Buying Car Parts
How to Increase Your Visibility When Driving at Night
BMW 5 Series F07 GT F10 F11 Angel Eyes Side Daytime Lights Fault and Vertical Aim Control Failure
How do You Select the Best Headlight Restoration Kit Online?
How To Turn On Your Headlights And The High Beam – 5 Easy Steps You Can Do