
Blower Motor Not Working: Find Out How You Can Keep Your Car AC In Top Working Condition
Are you facing issues with the blower motor in your car? From frustrating or even noisy operation to no circulation of air, blower motor not working in your car can be an annoying issue. With winter in full force now, problems with blower motor can make it extremely difficult to use your car.
More...
Without blower motor, the heater fan in the car air conditioning system will not work. The problem may be as simple as a fuse being blown or it may be due to a serious damage to the motor due to a rodent snagged in it. Whatever the cause is, here is a detailed tutorial to help you solve your issue effectively.

Why Is Blower Motor Not Working?
There are several reasons as to why blower motor has stopped working.
- reason 1
- REASON 2
- REASON 3
Normal State
Sometimes it may be a normal operating state of the car. In cars which have older climate control processes, the fans start working only when the vehicle reaches a particular temperature.
This helps prevent cool air circulating inside the car when you have chosen the heat element in climate control. In such a case it is best to check with similar models before you start dismantling the system to find out the issue.
Troubleshooting Blower Motor Defects
This has two parts – Blower motor replacement and testing electrical system.
Part I : Blower Motor Replacement
Step 1: Locate Blower Motor
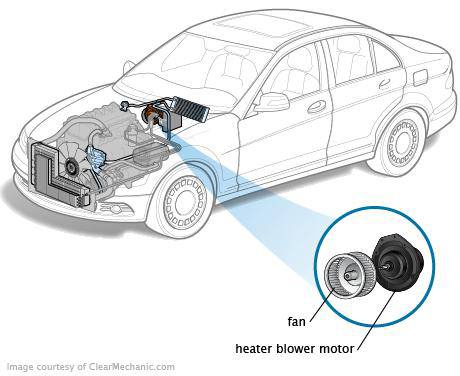
The first step to solve the issue is locating the air conditioner fan assembly. The blower motor is present in the heater case or AC duct housing assembly. The interior fan is usually present close to the heater core and evaporator. This can be found in the interior of the cabin or it may be present in the firewall’s engine compartment portion. If present near the engine it will mostly be close to firewall.
Step 2: Check Blower Motor
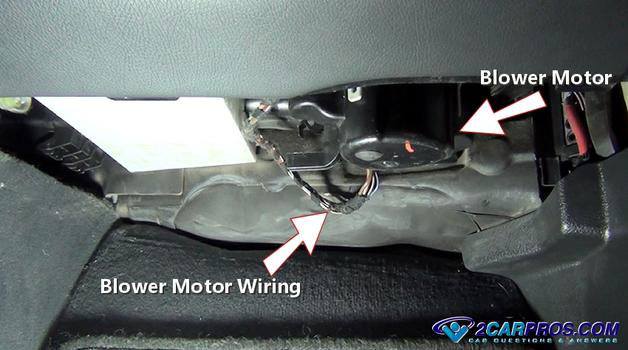
After you locate the blower motor, disconnect the wiring. This can be done by releasing safety tab present on the connector side. You will see a single wire or four based on the type of control in the system such as manual or automatic. The fan speed variation is based on the type of system used and can be a simple resistor or a solid state speed controller.
After removing the wiring, check for burnt terminals or corrosion. These indicate high current or resistance. Replace the connector if it is melted. To prolong motor life it is best to solder the wires instead of using a crimp type connector.
Step 3: Remove Motor
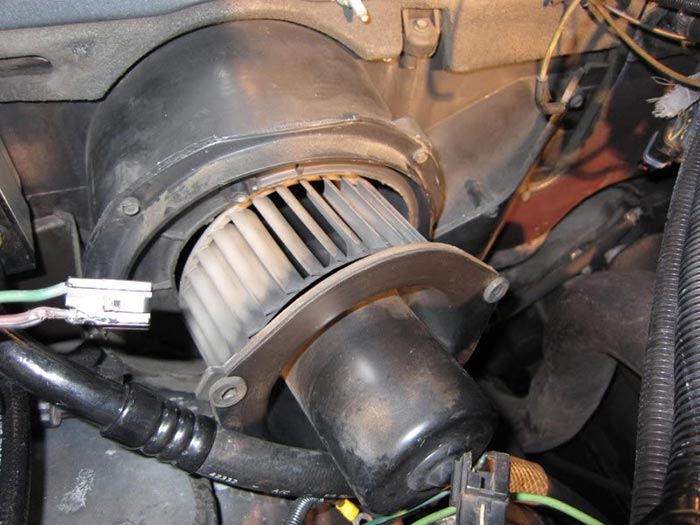
Image Source: Dieseltruck
The heater motor will have mounting screws that hold it inside heater box. The screws are inside a plastic housing and can be easily unscrewed. If you find the screws hidden by plastic tables or metal braces use a mirror to see them clearly.
Remove the screws one by one and remember to hold the motor all the while as it can fall out of the box. Make sure you do not damage fan blade while removing the motor from its housing.
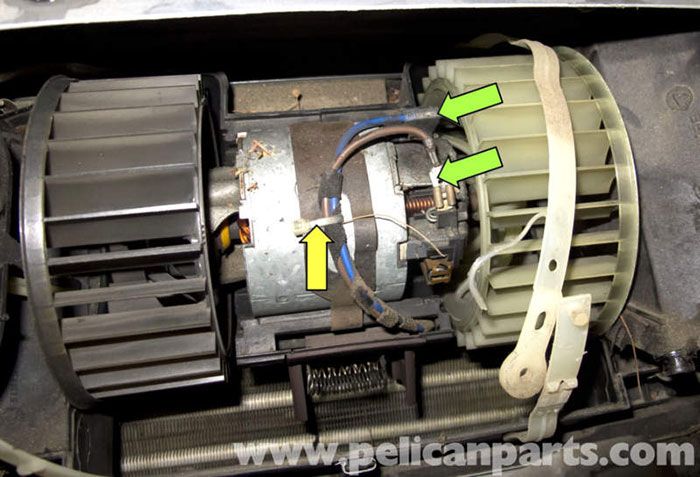
Step 4: Install New Motor
After removing the motor, compare the motor to a new unit. In some models, you may need to transfer the electronic speed controller to the new motor. In others you may have to retain the fan blade and use it in the new one.
You can do this by removing the clip or nut that is used for mounting the fan and forcing the blade off the motor using a screwdriver.
Avoid using lubricant or oil for removing or installing the fan, as it can cause the fan to slip on the motor shaft and cause more problems.
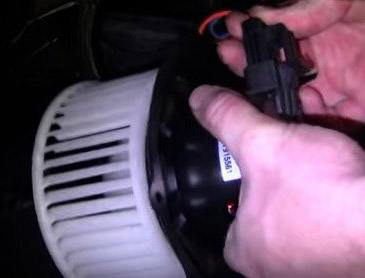
Image Source: Mustang Forums
Prior to setting up the new blower motor, check for obstructions like sticks, tooth picks, small toys or leaves that slip in through the outlet or inlet vents. These can prevent smooth working of the motor and cause failure of the motor prematurely. Maneuver the motor carefully and rotate it gently into the plenum while aligning it with the mounting holes.
Step 5: Place Screws
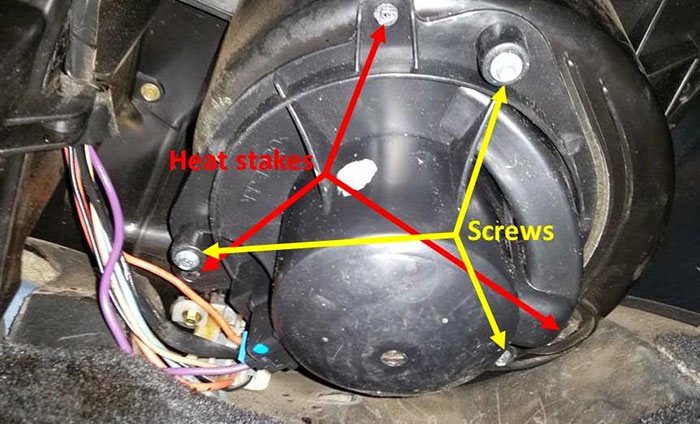
Image Source: Mark’s blog
Install mounting screws as you hold the motor firmly against the plenum. Thread the screws by hand first and then tighten them finally. This will prevent stripping screws out.
Make sure you use cross pattern for tightening the screws to ensure good fan blade alignment. If you do not do this step carefully, the blade can hit the housing causing a ruckus when the motor is working.
Step 6: Connectors
Check the tang that helps locate connector orientation before you install the motor. This step will avoid any electrical problems due to incorrect connector installation. Now reinsert the electrical connector of the blower fan motor and secure it in position.
You can hear a clicking sound that indicates proper installation. Tug on the wiring gently to ensure it is installed properly. Now reinstall lower dash cover. Next install mounting screws and tighten them to get a snug fit. Do this by hand instead of a screwdriver to prevent over tightening.
Now start the car engine, switch on climate control and listen to blower fan working. It should be smooth and air flow should be strong. If you still hear a squeak, rattle or ticking sound, off the system and recheck the motor installation.
Part II: Testing Electrical System
To begin this process, turn the ignition on and keep it in this position throughout the process.
Step 1: Check Blower Fan
With the engine turned on, set the fan to high, then to medium and low speed level. If you don’t feel any air coming from the vent you can go to the next step.
Step2: Check Electrical Wiring
Power to blower fan comes from a relay or fuse present in fuse panel. You can identify the fuse panel by the cover of fuse box or with help of owner’s manual. If after testing, there is no fault in the fuse, you can move to the next step.
If fuse is burnt, replace a new fuse. If new fuse too blows, it indicates a short in blower motor. This may be due to relay in the motor or wiring failure and appropriate replacement should be made.
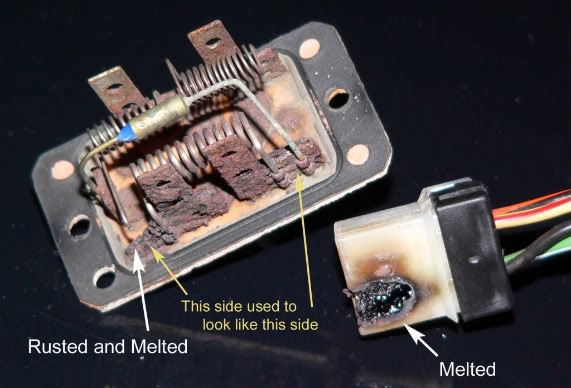
Image Source: F150ONLINE
Disconnect wiring connector in the motor. With a sharp metal hook or any other such object and test light check the power at connector. This will confirm whether the ground and power to the wiring is intact. If the power to the motor is unaffected, the problem may be with the blower motor. You can also pierce wires of wiring harness to do this test.
If test light does not light up, the fault is with power circuit or ground and you need to know wiring schematic to solve the problem.
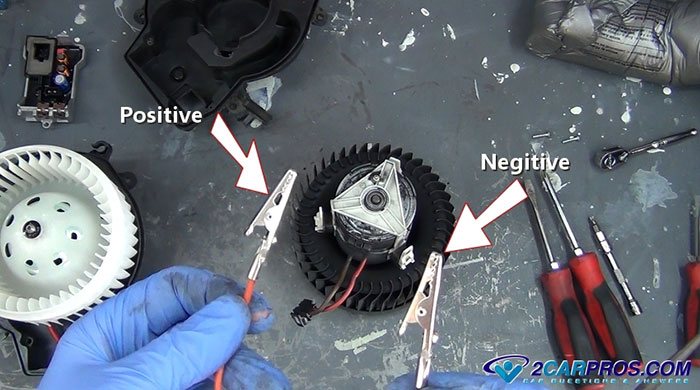
Step 3: Circuit Check
For testing blower motor prepare negative ground and positive power lead using a power source of 12 volt (a car battery). Keep the clips away from each other to prevent sparks or heating up. Attach negative wiring and power clips to wiring harness of the motor by gripping it firmly.
If you have just the power lead in the unit attach ground wire to motor frame. With the circuit completed, you can find out whether the motor is working or not. The units usually fail intermittently due to heater failure in heater switch, climate control relay or fuse holder even if circuit has power.
Blower motor not working is an issue that can be fixed easily with the above tutorial. We hope you found the guide useful. If so we welcome your valuable comments and remember to share this guide on social media.
Related Posts
Fleet Fuel Cards for Optimal Car or Truck Expense Tracking
Top Simple Ways to Improve the Look of Your Car
The Top 10 Safest Vehicles In The US 2022
3 Things You MUST Know Before Buying Car Parts
Racing Harness? Never Heard of That